Untangling dialogs in React Router
Dialogs seem simple....until you run into when and where to do data loading, handling errors and success feedback, and inevitably resorting to useEffect. In this post, I’ll break down how to implement modal dialogs using React Router 7, covering patterns for nested routes, optimizing loader requests, showing feedback messages, programmatically closing dialogs, and preserving animations...all without a single useEffect.
Project setup
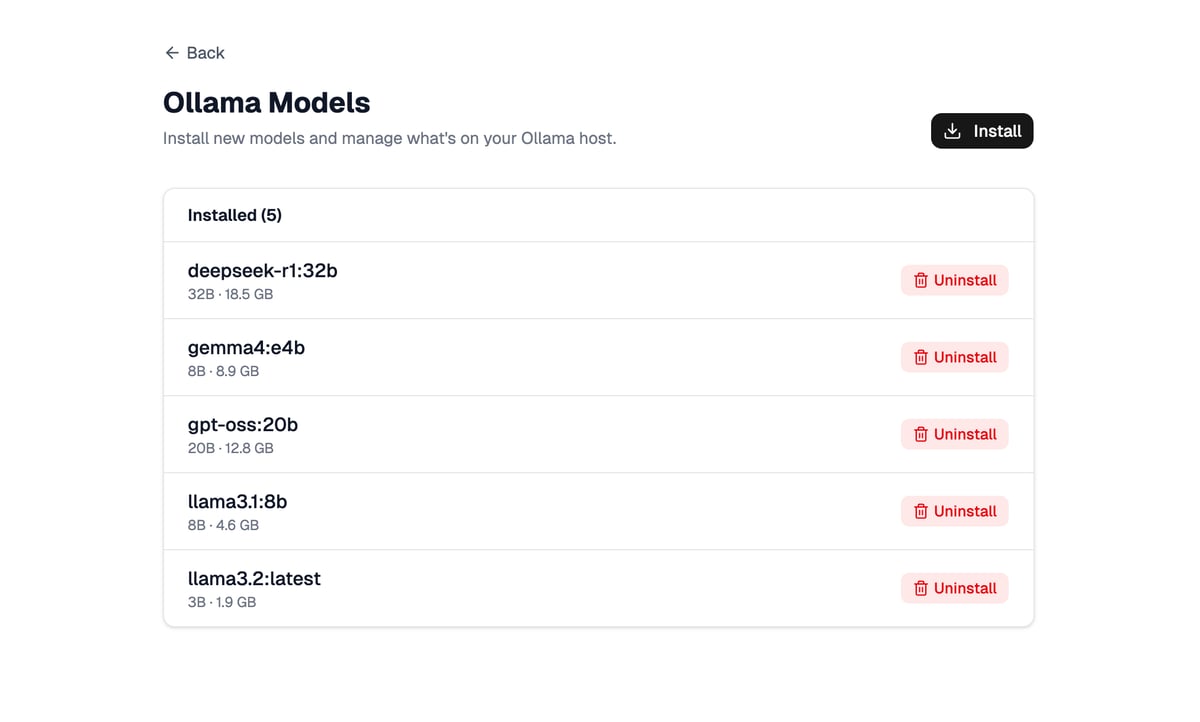
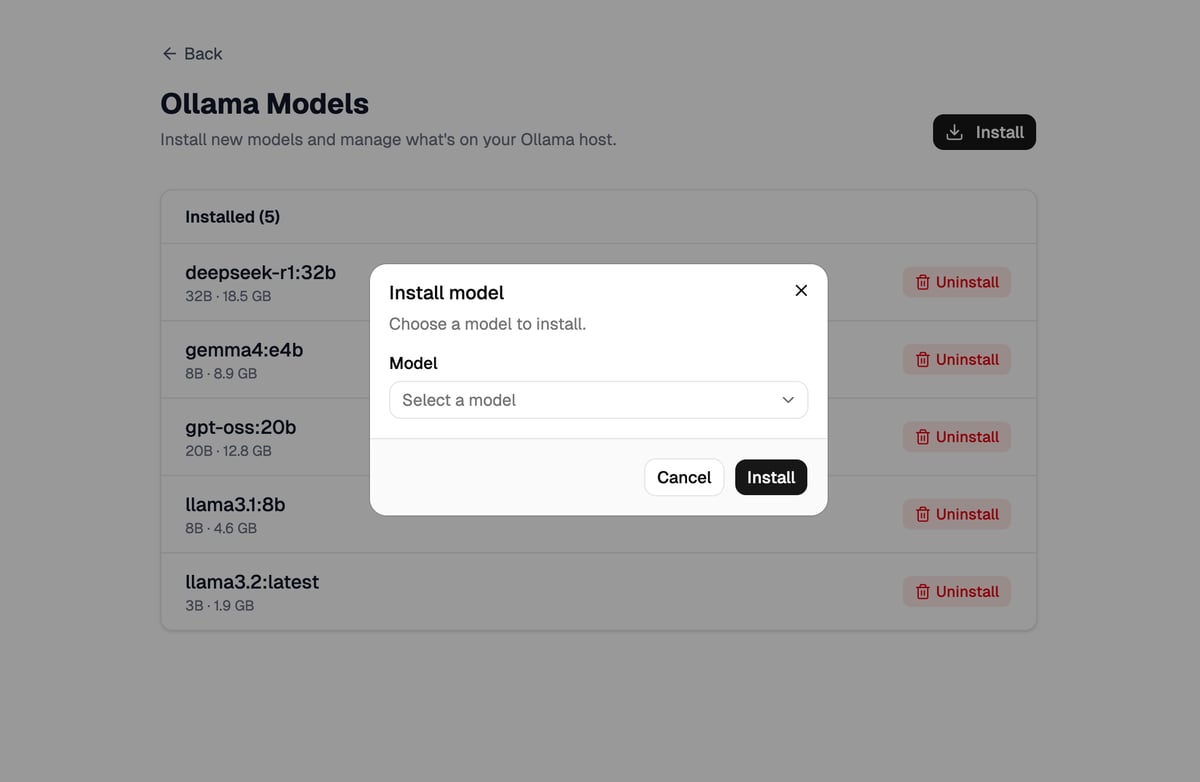
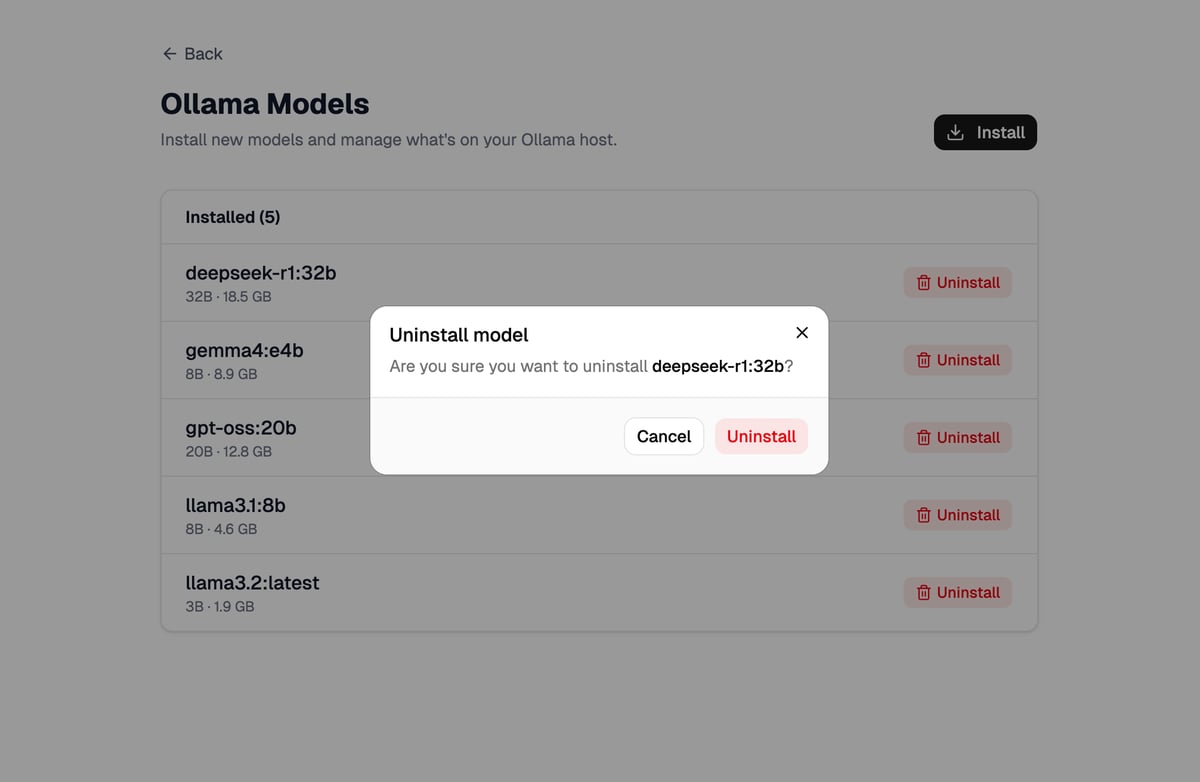
I'm going to be walking through a simple demo app. The app is a UI to manage an Ollama instance. Ollama is an open-source tool that lets you run large language models (LLMs) locally on your own computer or server. Our app will have a route that lists installed models, allow the user to install a model, and allow the user to uninstall a model. The install and uninstall options will be in dialogs.
We're going to be using React Router in framework mode, tailwind, and shadcn components.
Here's what it looks like (Stackblitz demo here)
First attempt
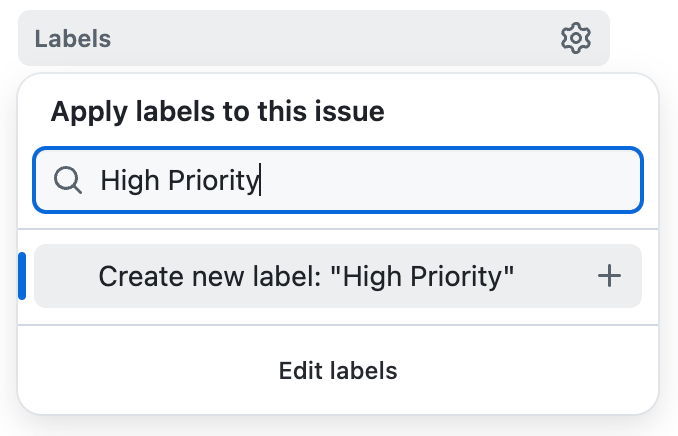
Your first inclination, like mine, is probably to simply use a <Dialog>, or two, in this app/routes/models.tsx route. The Install Model dialog requires some data though. We need to make a request to get the list of available, uninstalled models. Pulling in useFetcher is a logical next step. However, now we need a resource route to provide the list of models to choose from as well. We'll assume that already exists. The models route component could look something like this:
export async function loader() {
  const models = await listInstalledModels()
  return data({ models })
}

export default function ModelsPage({ loaderData }: Route.ComponentProps) {
  const { models } = loaderData
  const loadModelsFetcher = useFetcher()

  const onInstallClick = () => {
    loadModelsFetcher.load(href("/resources/models/installable"));
  }

  return (
    <>
      ...page header...

      <Dialog>
        <DialogTrigger asChild onClick={onInstallClick}>
          <Button type='button'>Install</Button>
        </DialogTrigger>
        <DialogContent>
          <Form method="post">
            ....
            <ModelSelect models={loadModelsFetcher.data ?? []} />
            ....
          </installModelFetcher.Form>
        </DialogContent>
      </Dialog>

      ...models list...
    </>
  );
}
We also need a <Dialog> for the Uninstall Model dialog. That could also be put into this ModelsPage route component or in a <ModelsTable> component. Pick your poison. Is there a right answer? 🤷♂️ We'll need to account for both install and uninstall in this route's action though which means we'll need to pass form data to the action to distinguish our intent.
<input type="hidden" name="intent" value="install" />
// or
<input type="hidden" name="intent" value="uninstall" />
Oh wait, we also want to dismiss the dialogs after successful submissions. This means we need to be able to control the open state of our dialogs. We need to throw in at least one useState for this.
Hmm, how do we close the dialog on a successful submission? We could await a useSubmit or a fetcher.submit() but those return void, not the result of the submission. We could optimistically close it but that's pretty poor UX if an error is returned. I guess we need a useEffect to "listen" to the actionData and toggle the state that way...? 😩
const [open, setOpen] = useState(false);

useEffect(() => {
  if (actionData?.success) {
    setOpen(false);
  }
}, [actionData])

// ...

<Dialog open={open} onOpenChange={setOpen}>
...
</Dialog>
We also need some bits of state for the Uninstall Model dialog: dialog open state and which model we're uninstalling.
Our ModelsPage route is quickly getting complex. It handles loading models, installing, and uninstalling models, fetchers, dialog state, syncing the submission state. There's a lot going on here.
There must be a better way!
Take two
Instead of implementing the dialogs directly in the app/routes/models.tsx route, let's make this route a parent route that renders an <Outlet /> after the models table and then we'll create distinct routes for install and uninstall. These will render into the <Outlet />.
app/routes/models.tsx
app/routes/models.install.tsx
app/routes/models.uninstall.$name.tsx
Right off the bat, we have a way better idea of what's possible in the application just by looking at the routes. However, I've tried this before and ran into problems. React Router has recently had some features implemented that could come in handy though. Let's see how far we can get.
Back to basics
In the app/routes/models.tsx route, let's rip out out the dialog stuff:
Dialogmarkup- Dialog
useStates - fetchers
useEffect- resource route
Ah, doesn't that feel nice? A route responsible for one thing: listing the models.
Let's add the Install button back in but make it a link to a new route we'll create. We also need to make sure we're rendering an <Outlet /> into this route.
<Button className="mt-6" asChild>
  <Link
    to={href("/models/install")}
    unstable_defaultShouldRevalidate={false}
    preventScrollReset
  >
    <Download className="mr-1" />
    Install
  </Link>
</Button>

...models list...

<Outlet />
Whoa, what are those props on the <Link>???
unstable_defaultShouldRevalidate is a new feature I was able to contribute to the framework in November. You can read more about it here. Basically, it allows you to disable the revalidation of active routes on a navigation. Since clicking this link will result in a navigation, React Router usually revalidates all active routes. We don't need the app/root.tsx loader(if there is one) and the app/routes/models.tsx route loader to revalidate in this case. Instead of implementing shouldRevalidate functions in these routes, we can change the behavior here at the call-site. Pretty handy for optimizing our network calls.
preventScrollReset does exactly what it says. Since we just want the UX to seem like the user is opening a dialog that overlays the existing content, we can set this prop so React Router doesn't automatically scroll the user to the top of the screen. It makes for a seamless transition.
We'll change the Uninstall buttons to also be links to the appropriate route.
<Button variant="destructive" size="sm" asChild>
  <Link
    to={href("/models/uninstall/:name", model)}
    unstable_defaultShouldRevalidate={false}
    preventScrollReset
  >
    <Trash2 />
    Uninstall
  </Link>
</Button>
First dialog
We'll implement the uninstall route/dialog first. Since it will be in its own route we can use a boring loader and action instead of fetchers.
// app/routes/models.install.tsx

export async function loader() {
  const models = await listUninstalledModels();
  return data({ models });
}

export async function action({ request }: Route.ActionArgs) {
  const formData = await request.formData();
  const name = formData.get("name") as string;

  if (name.includes('qwen')) {
      return data({ error: "Something went wrong :("}, { status: 400 })
  }

  const model = await searchModel(name);

  await installModel(model);

  throw redirect(href("/models"));
}

export default function ModelInstall({
    loaderData,
    actionData
}: Route.ComponentProps) {
  const navigate = useNavigate();
  return (
    <Dialog
      open
      onOpenChange={(open) => {
        if (!open) {
          navigate(href("/models"), {
            unstable_defaultShouldRevalidate: false,
            preventScrollReset: true,
            replace: true,
          });
        }
      }}
    >
      ...

      {actionData?.error ? (
          <Alert variant="destructive">
            <AlertCircleIcon />
            <AlertTitle>Unable to install model</AlertTitle>
            <AlertDescription>{actionData.error}</AlertDescription>
          </Alert>
        ) : null}

      <Form method="post" preventScrollReset replace>
        ...
      </Form>

    </Dialog>
  );
}
This looks like basically any other route which is great. Boring is good.
Because we need to account for the user dismissing the dialog, we need to add an onOpenChange callback to listen for it being closed and then navigate back to the /models route. We also navigate away after a model is installed in the action.
The replace prop is added to clean up the browser history. We don't really want the dialog route to be navigate-able via the back button so we can "replace" the /models/install stack entry with the /models entry.
We still don't want to trigger a revalidation of routes when the user closes the dialog so we use unstable_defaultShouldRevalidate. We also don't want the screen to jump on close so preventScrollReset stays as well.
I'm just hardcoding in a known condition to emulate error handling so we can see what that will look like. We display the errors directly in the dialog.
Issues
This seems pretty good so far but there are two problems we haven't accounted for:
- Success feedback message
- Close dialog animation
Success feedback
After a successful submission, we're navigating back to the /models route. The route will revalidate which means the newly installed model will show up in the list but other than that there's no feedback to let the user know their action was successful. It can be pretty easy to miss the new entry popping into existence. Let's add a toast.
In the app/root.tsx, we'll add the toast container component.
<body>
  {children}
  <Toaster position="top-center" />
  <ScrollRestoration />
  <Scripts />
</body>
Now we need to figure out how to actually trigger a toast. We could use a query param in the navigation but that's not really something we want in our urls.
const params = new URLSearchParams({
  message: "Model installed successfully."
})
throw redirect(href("/models")} + `?${params}`);
👎
This is a good candidate for session state. We'll set up cookie session storage in a new file.
// app/session.server.ts
import { createCookieSessionStorage } from "react-router";

type SessionData = {
  userId: string;
};

type SessionFlashData = {
  toast: string;
};

const {
  getSession: getSessionBase,
  commitSession,
  destroySession,
} = createCookieSessionStorage<SessionData, SessionFlashData>({
  cookie: {
    name: "___session",
    httpOnly: true,
    maxAge: 60,
    path: "/",
    sameSite: "lax",
    secrets: ["s3cret1"],
    secure: true,
  },
});

async function getSession(request: Request) {
  return getSessionBase(request.headers.get("Cookie"));
}

export { getSession, commitSession, destroySession };
This is mostly taken from the docs, but I have created a more convenient getSession function and implemented the types for the session data and flash session data.
Session data is what needs to exist for the life the user using the app. Things like the current user details. Flash session data is temporary data meant to be read out of the session once and is removed afterwards. This is ideal for our use case.
We can now use this in our action.
// ...

await installModel(model);

const session = await getSession(request);
session.flash("toast", "Model installed successfully.");

throw redirect(href("/models"), {
  headers: {
    "Set-Cookie": await commitSession(session),
  },
});
We flash the message to the session and commit it as a header.
We can consume this in the /models route. First we need to read it out in the loader.
// app/routes/models.tsx
export async function loader({ request }: Route.LoaderArgs) {
  const models = await listUninstalledModels();
  const session = await getSession(request)
  const toast = session.get('toast')
  return data({ models, toast }, {
    headers: {
        'Set-Cookie': await commitSession(session)
    }
  });
}
Okay, so now we're getting it out of the session but this is on the server side. We need to do something with this on the client. useEffect in the component? Nope!
We can implement a clientLoader to intercept this data before it gets sent to the route component.
// app/routes/models.tsx
export async function clientLoader({ serverLoader }: Route.ClientLoaderArgs) {
  const result = await serverLoader();
  if (result.toast) {
    toast.success(result.toast);
  }
  return result;
}
Our component remains untainted by useEffect and anything related to toasts. Perfect.
Don't like toasts? No problem. We're still passing the toast message as loaderData that the /models route component will have. You could display directly in the component above the models list if you like that better.
Exit animation
Now we need to tackle the exit animation. The problem is that when the user navigates from a dialog route back to the parent /models route, the dialog elements are immediately removed from the dom. The dialog just pops out of existence. There's no nice fade/scale out animation like when the dialog is opened.
When a dialog pops into existence, you can animate the elements because...well...they exist. The reverse is a problem though. Animating an element that doesn't exist anymore is...tricky. Normally, when you use a shadcn dialog it manages the enter/exit animation behind the scenes and you don't have to worry about it. It does some fancy stuff to wait until it animates out until elements are removed from the dom.
Now that we've tied the dialog to the routing, there is no waiting. The elements are immediately removed.
Luckily for us, browsers have implemented a feature that React Router also supports that we can leverage here.
View transitions
View transitions let the browser animate smoothly between dom states. So for our use case this would be state of the dialog existing and then the dialog ceasing to exist.
We need to target the relevant elements for animation. In the shadcn dialog component file we need to update the overlay and content components:
// app/components/ui/dialog.tsx

<DialogPrimitive.Overlay
    data-slot="dialog-overlay"
    style={{ viewTransitionName: "dialog-overlay" }}

// ...

<DialogPrimitive.Content
    data-slot="dialog-content"
    style={{ viewTransitionName: "dialog-content" }}
We also need to remove the blur effect on the overlay. It doesn't seem to play nice with view transitions here.
-- bg-black/10 duration-100 supports-backdrop-filter:backdrop-blur-xs
++ bg-black/40 duration-100
Next, we need write some view transition css to match the existing animation classes on those components.
/* app/app.css */

@keyframes dialog-content-in {
  from {
    opacity: 0;
    transform: scale(0.95);
  }
}
@keyframes dialog-content-out {
  to {
    opacity: 0;
    transform: scale(0.95);
  }
}
::view-transition-old(dialog-content) {
  animation: dialog-content-out 100ms ease forwards;
}
::view-transition-new(dialog-content) {
  animation: dialog-content-in 100ms ease forwards;
}
::view-transition-old(dialog-overlay),
::view-transition-new(dialog-overlay) {
  animation-duration: 100ms;
}
The final step is to actually start a view transition on navigate. Back in our app/routes/models.install.tsx component:
<Dialog
  open
  onOpenChange={(open) => {
    if (!open) {
      navigate(href("/models"), {
        unstable_defaultShouldRevalidate: false,
        preventScrollReset: true,
        replace: true,
        viewTransition: true,
      });
    }
  }}
>
...
<Form method="post" preventScrollReset replace>
There are two cases where we need to set the viewTransition option. Both result in navigating back to the /models route and the dialog ceasing to exist.
Success! Now the dialog animates nicely out in a way that matches the "in" animation.
I may have lied...
If you're following along, you might notice that if there is an error returned, the dialog kind of bounces. This is because it's all wrapped in a view transition and due to our css, we're fading and scaling when the dom changes(the error renders). It's almost like the dialog is optimistically closing but then the error prevents the dialog from actually being removed and the dialog bounces back.
I feel like this is a fair trade off but if your dialogs return errors often you might disagree. We can solve this by pulling in a useEffect.
First, the action needs to change to always return action data instead of throwing a redirect.
// app/routes/models.install.tsx

// ...

const session = await getSession(request);
session.flash("toast", "Model installed successfully.");

return data(
  { error: false },
  {
    headers: {
      "Set-Cookie": await commitSession(session),
    },
  },
);
Next, we'll remove the viewTransition prop from the <Form> so it doesn't animate when errors update the dom.
// app/routes/models.install.tsx

<Form method="post" preventScrollReset replace>
Finally, we need to add a useEffect to listen for the error being explicitly false. Then we can navigate with the viewTransition option there.
// app/routes/models.install.tsx

useEffect(() => {
  if (actionData?.error === false) {
    navigate(href("/models"), {
      unstable_defaultShouldRevalidate: false,
      preventScrollReset: true,
      replace: true,
      viewTransition: true,
    });
  }
}, [actionData]);
This prevents the dialog from bouncing when there's an error and we're still syncing the dialog with the route buuut we're resorting to the dreaded useEffect. Tradeoffs. ⚖️
Wrapping up
What started as mess of useEffect, fetchers, and dialog state has turned into something fairly straightforward. Each dialog lives in its own route with a single responsibility.
The real win here isn't just avoiding useEffect, it's that the code now reflects how we actually think about the application. Want to know what actions are possible? Look at the routes.
View transitions solved the exit animation problem that's made route-based dialogs feel janky. Combined with unstable_defaultShouldRevalidate for performance and flash sessions for feedback, we have a pattern that's actually pleasant to work with.
I've been fighting with dialog implementations for years, trying tons of different ideas. This is the first approach that's felt genuinely good. The framework does the heavy lifting; we just need to leverage the available tools.
If you've been wrestling with dialog state in your React Router apps, give this pattern a shot. The full demo code is available on GitHub if you want to see everything wired up together.
Want more posts like these? Let me know by signing up to be notified when I publish. 👇 ✌️